This look is all about the eyes and lips, so we’re going to focus on that on this tutorial.
Here’s a photo of how it looks like on my model Catherine:

Keep reading to know how to achieve this look 🙂
 left to right
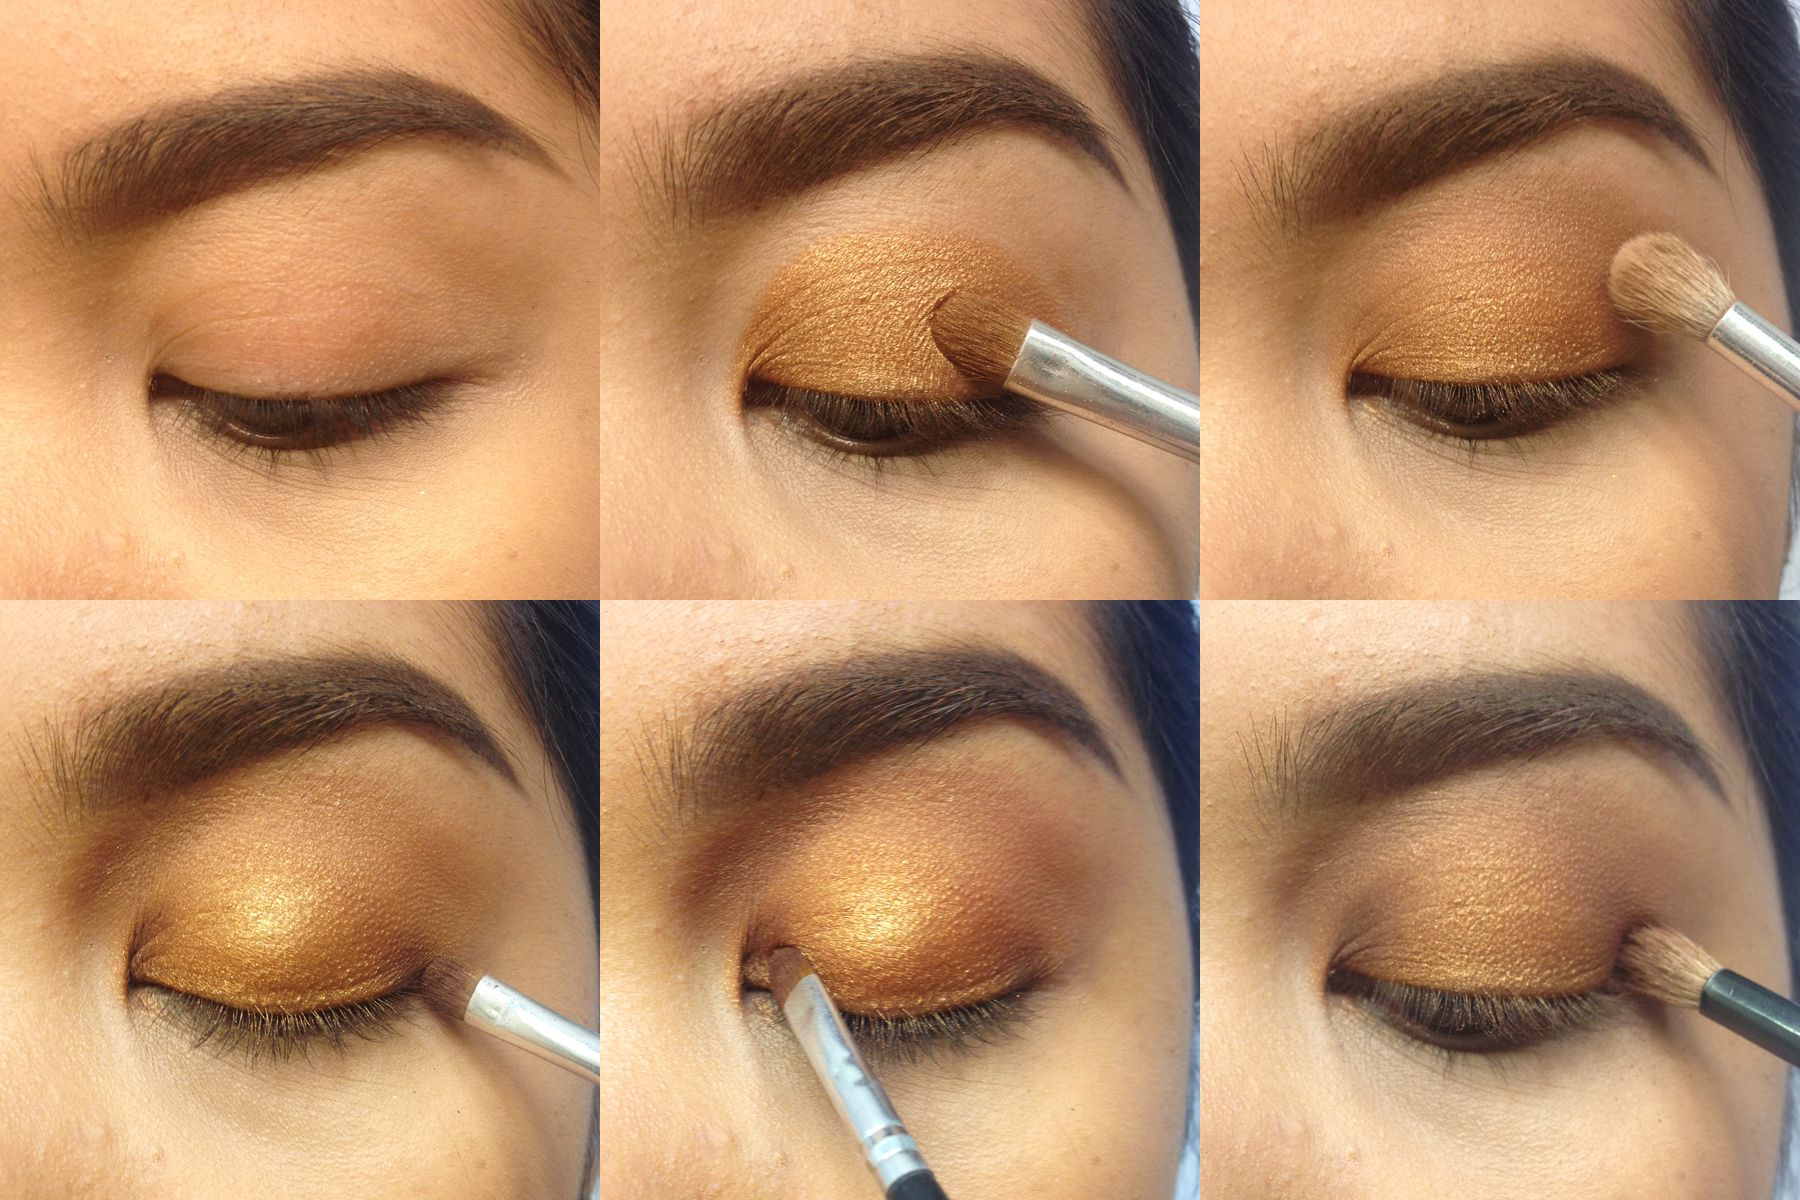
1. I’ve already done my eyebrows, so I’m going to start with the eyes.
Prime your eyelids with any eyeshadow primer of your choice.
2. Apply a gold eyeshadow all over your eyelids, I used PAC’s pearly eyeshadow in P06
3. With a blending brush, diffuse the gold going towards the brow bone in a circular, buffing motion.
Notice how the edges are now softer and look like they are fading out?
4 & 5. On the outer corner and inner corner of your eye, apply a dark brown shadow to reveal the contour of your eye.
I used PAC’s matte eyeshadow in M07
6. Blend inwards with a blending brush so that there are no sharp lines.
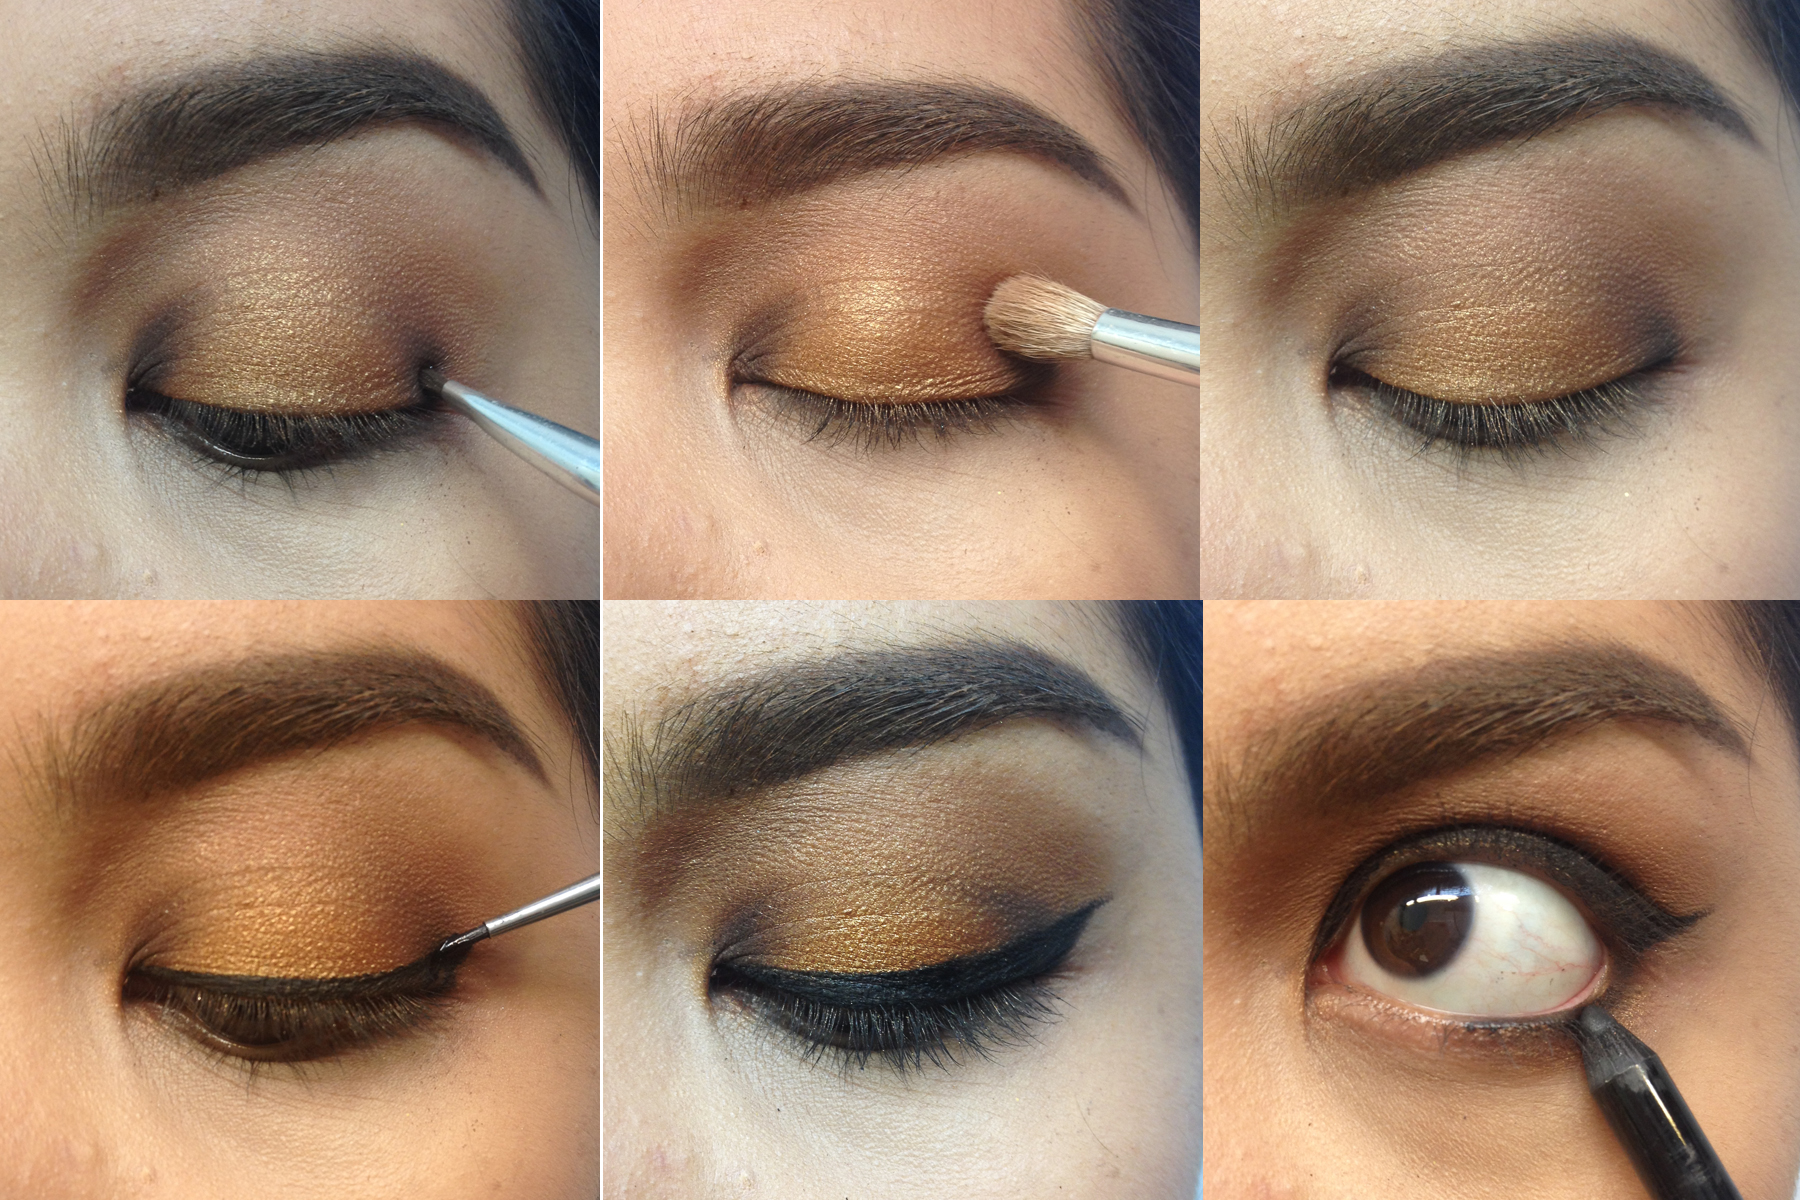
7. Now on a small fine brush, take a black eyeshadow and apply over that dark brown eyeshadow
on the inner and outer corner of your eyes.
8. Soften the black eyeshadow with a blending brush.
9. It should look like this by now 🙂
10. Add your wing liner! 🙂
12. Now for definition on the lower lashline, use a soft black liner on your waterline and lower lashline.
You can also create the illusion of bigger eyes using white liner on the waterline, and then black on the lashline, but since I have big eyes, so I just went with black on both.
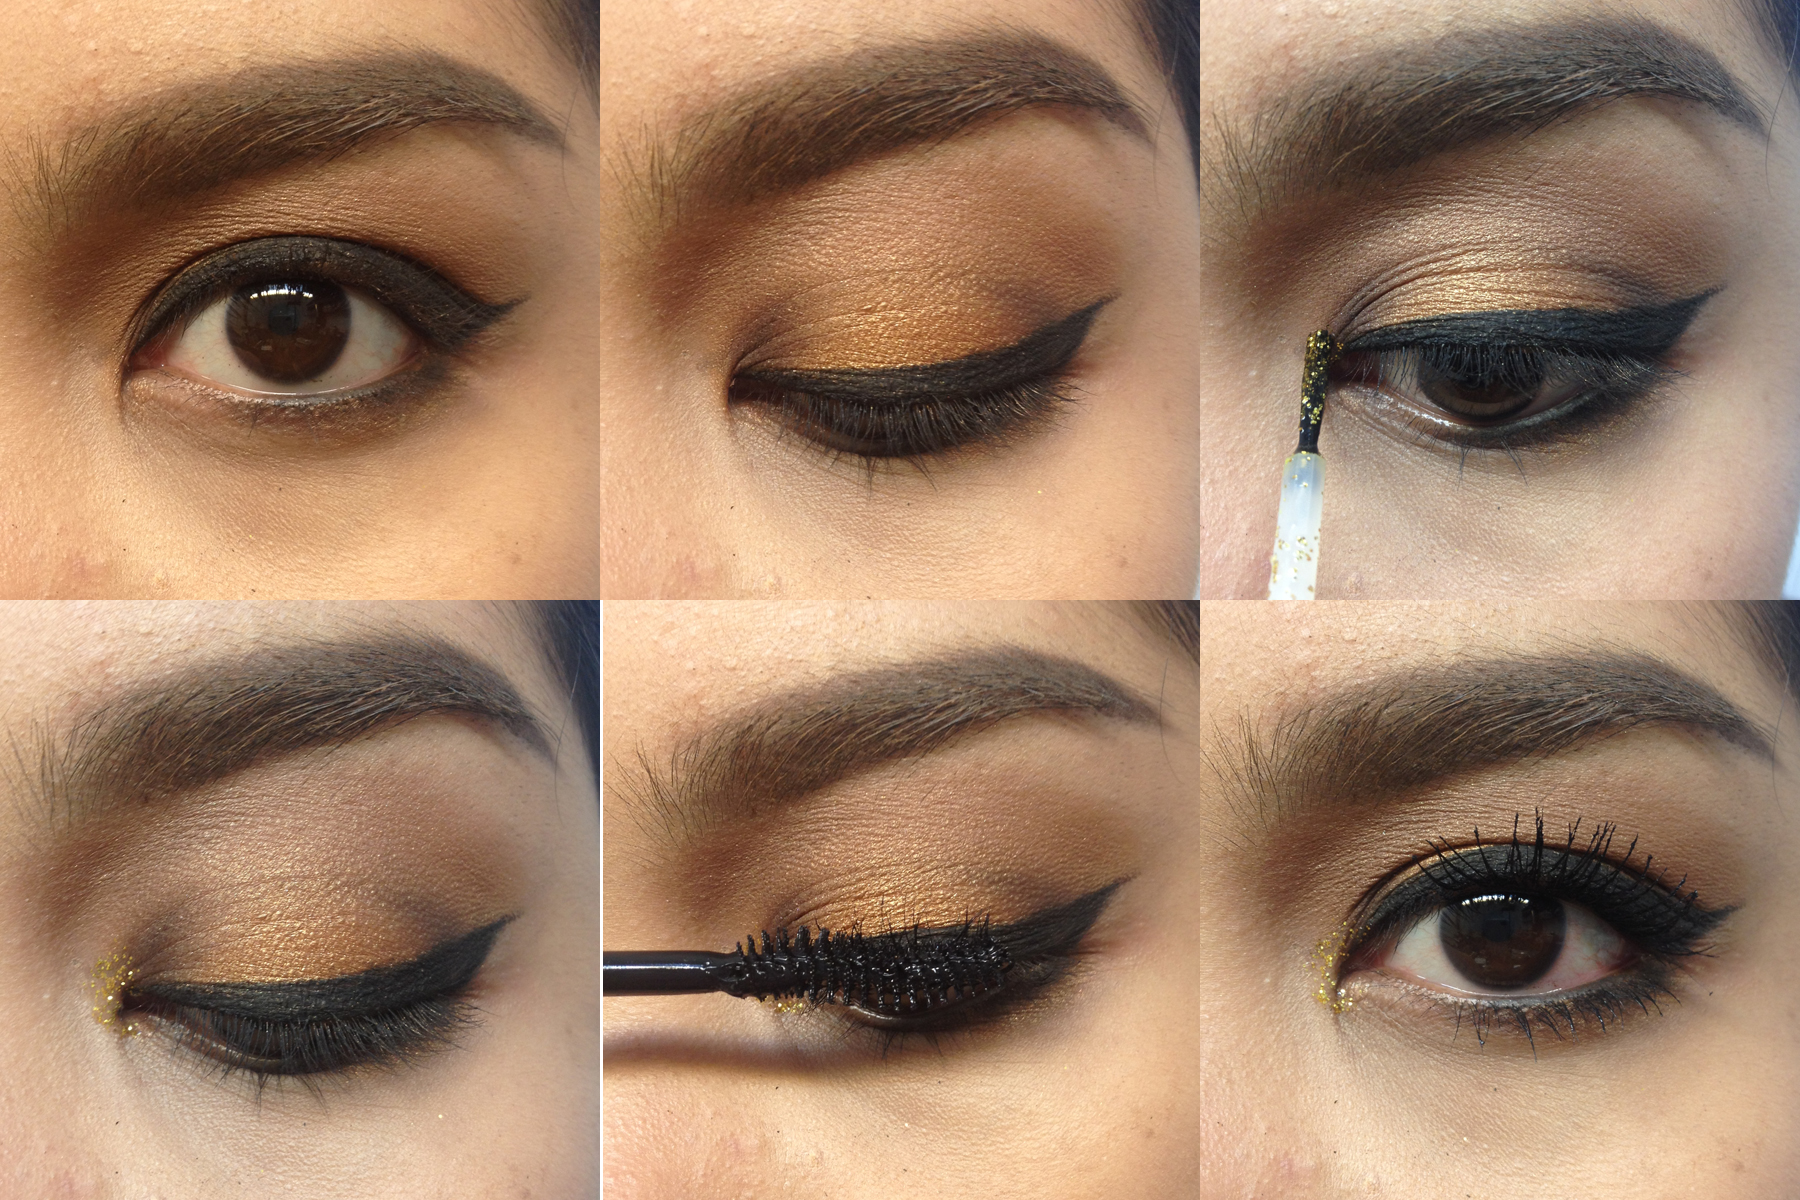
13 & 14. Just shows you how it looks like since we started. I would actually go for a darker and more dramatic lower lashline definition by adding black shadow over the black liner that we applied, but for the purpose of this tutorial, I only used the liner.
15. Apply gold glitters on the inner corner of your eyes 🙂
17. Mascara!
18. And voila! — this is just one coat of mascara, I recommend you apply at least 2 coats for fuller looking lashes.
You can also opt for false lashes 🙂 Just remember to attach them first and then a coat of mascara, so that all of the lashes look merged and natural.
And now, the lips! 🙂
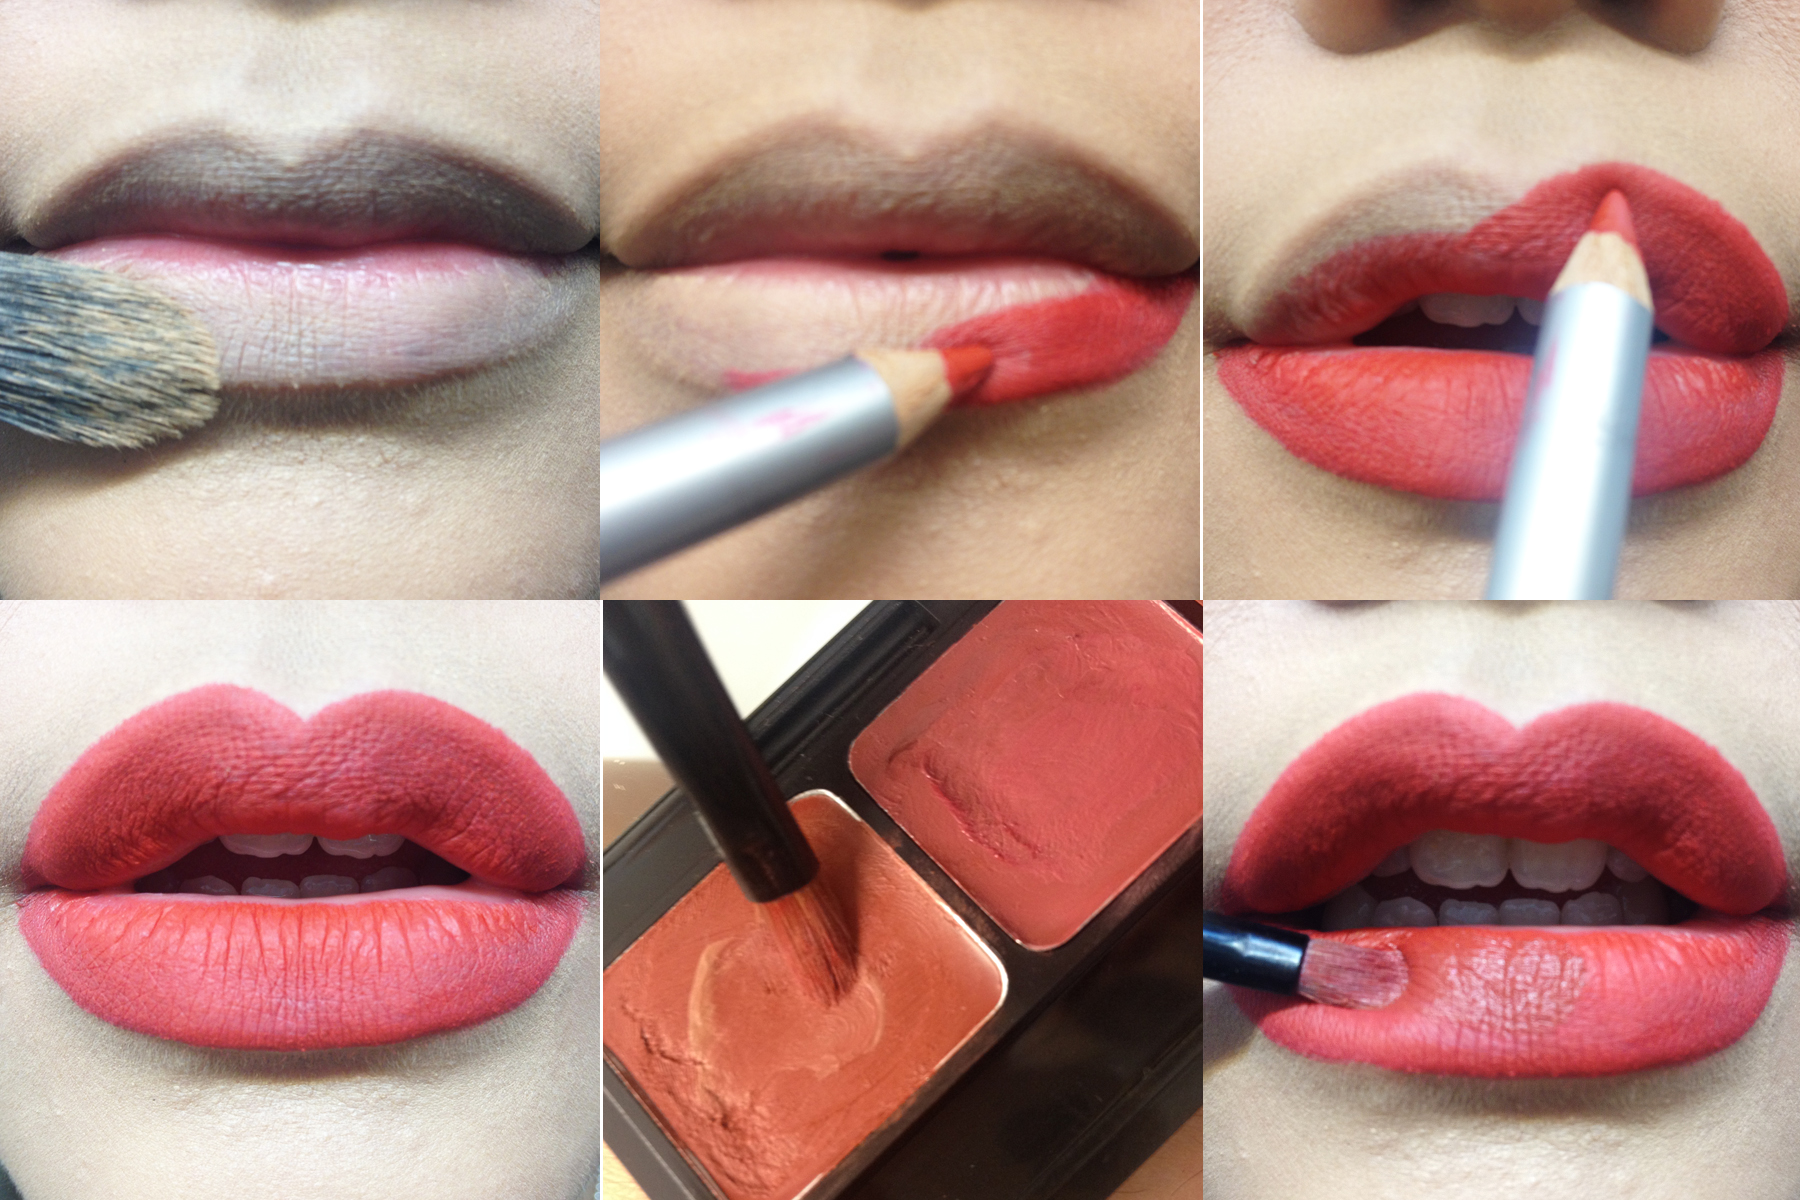
1. If you are using a bright lip, or if you plan to overline your lips (which I will both be doing), make sure you cover your entire lips either with a concealer, or your foundation to make sure that the tones are uniform on your lips and above your lips.
2. I typically start lining my bottom lips. Follow the natural shape of your lips (unless you have thin lower lips and wanna overline) Line and fill in with your lip pencil.
3. You will notice that I have slightly gone beyond my natural lip and went for a more rounded shape. If you already have full lips, you can just follow your natural lip shape or even make it appear thinner by drawing under the shape of your lips.
4. and this is how it looks like 🙂
5. It’s not true that you should always add lipstick over your lip pencil or that you can only use lip pencil to “line” your lips.
This could actually go on its own 😉 For this look though, I wanted a warmer shade of red, so with a lip brush I used the leftmost shade on PAC’s Coco bunch lip palette which was a light brown color.
6. and just apply all over the lips.
This was quick and fun to do, I hope this has been helpful to some of you and I am looking forward to seeing your versions of this look. Send me your photos via my Facebook page or email me at [email protected]
Also, check out PAC Cosmetics at SM Premier department stores 🙂

Beautiful look!
LikeLike
Such a pretty look!
LikeLike